This post is well overdue.
Back in July Jude http://newsfromjude.blogspot.com/2021/07/a-bloganniversary.html had a special bloganniversary post and competition. She asked for how many posts she had done. What she didn’t realise was that on her side bar it tells you the totals each month. So you could quickly add them up.
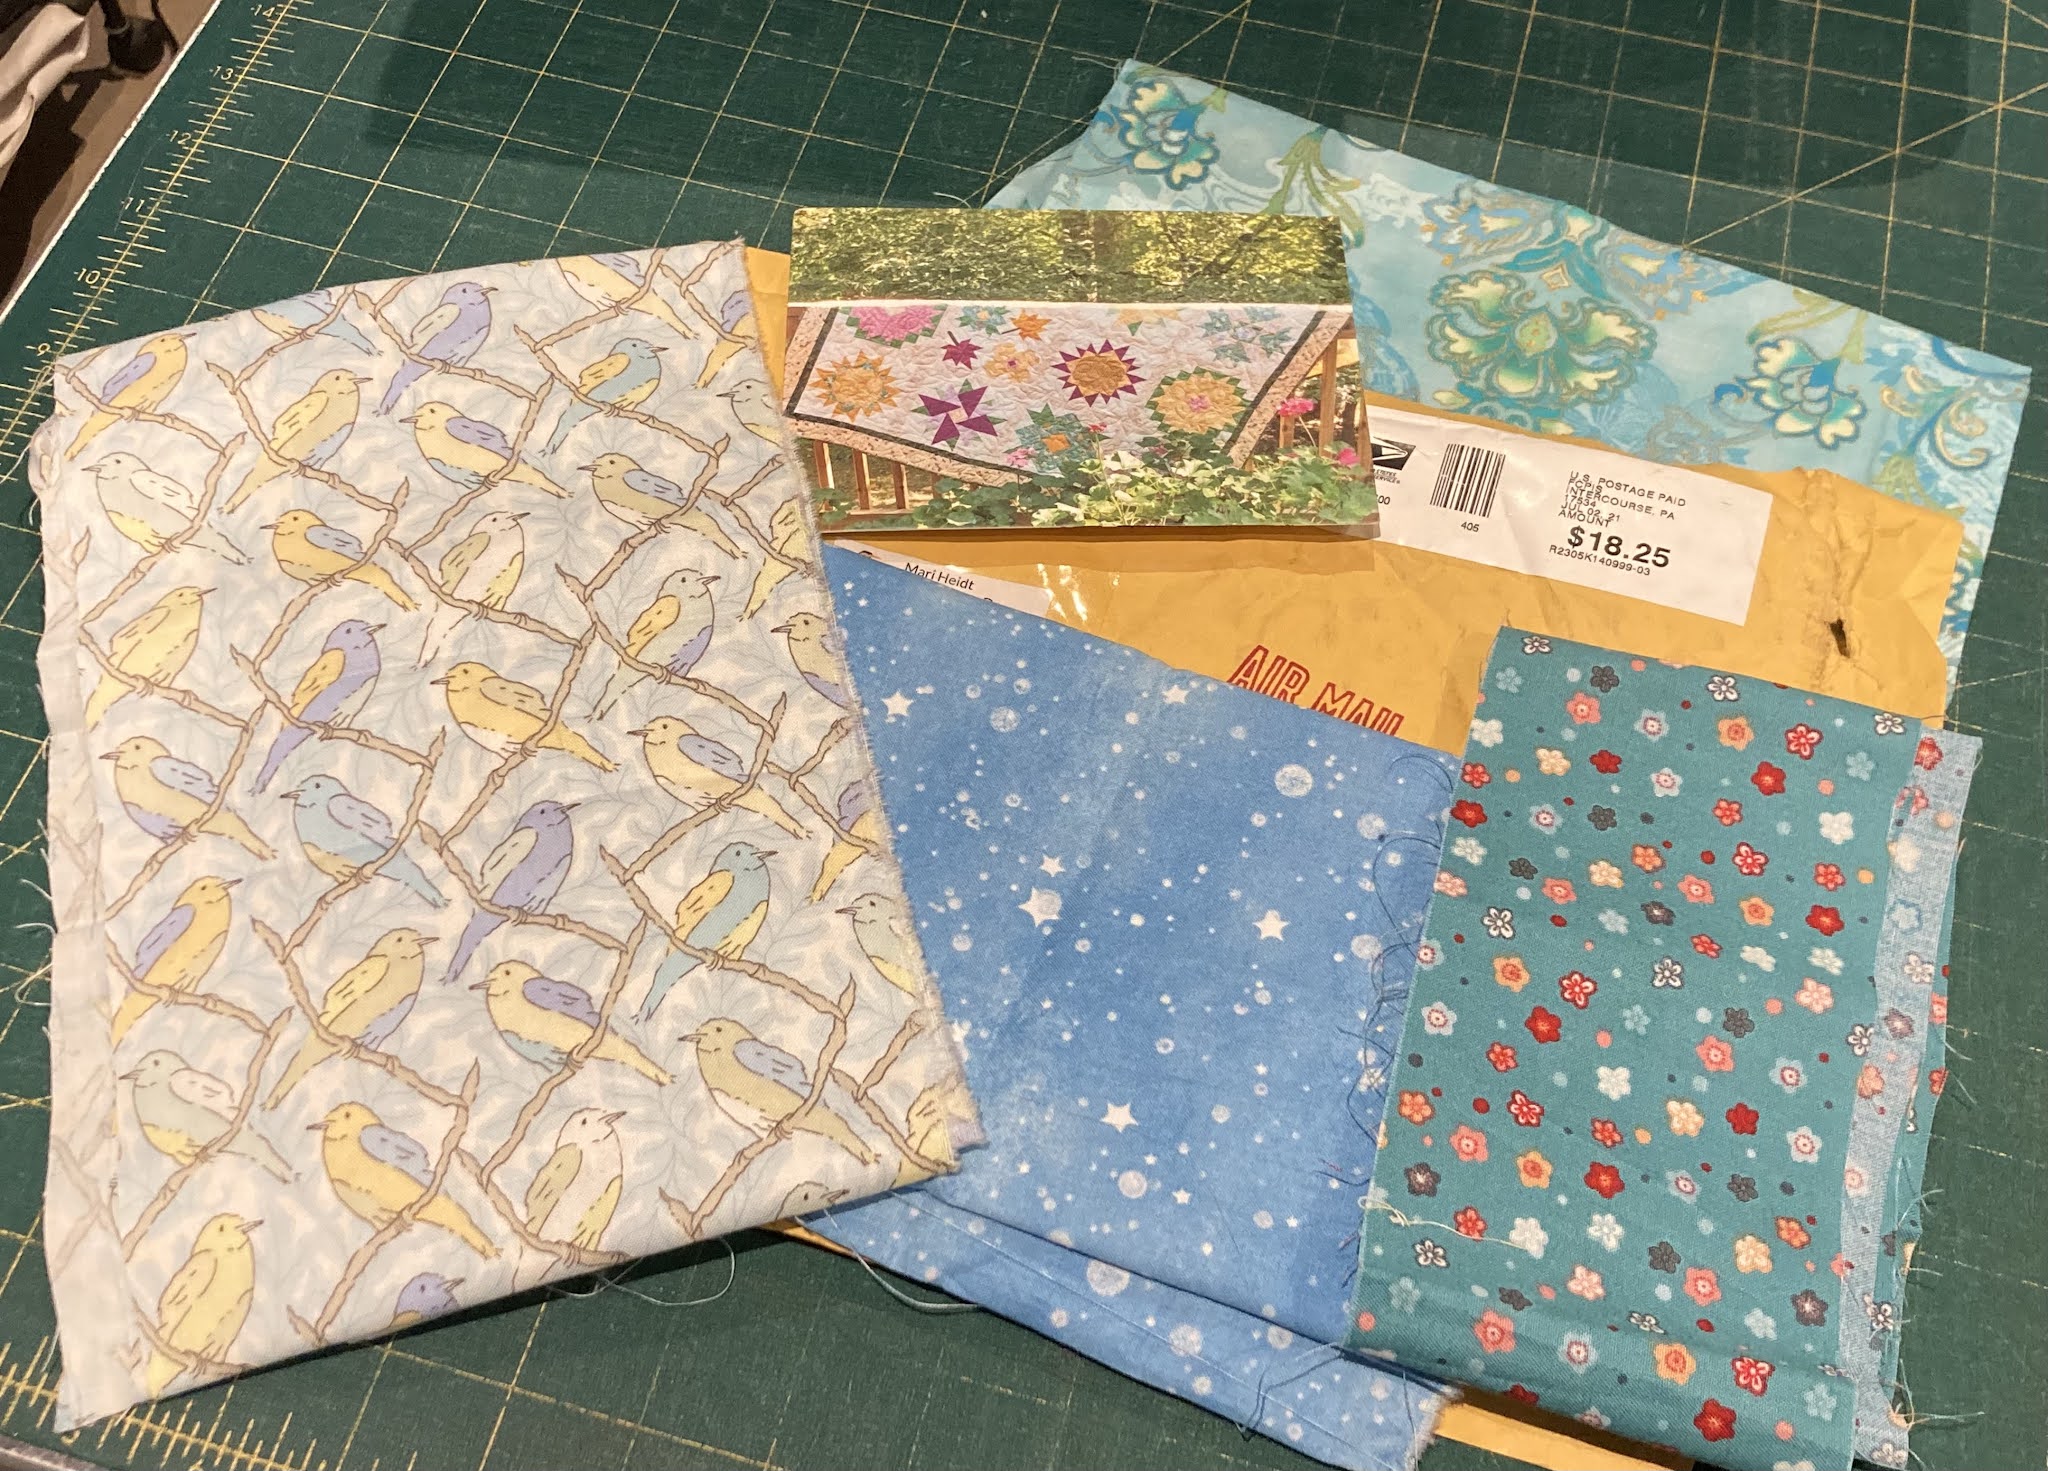
Anyway Jude discovered this early on but still decided to send Di and I a gift to say thanks for joining in. This is what I received.
How special is this case. It’s a great size for any special work to be held

It was heavy so what’s inside……. It is jam packed with…….

Fabric, precautions 2.5” squares, thread, photo printing paper, her special pink pen, fat 1/4 bundle, jelly roll pack, so much fabric, bear pattern and a William Morris pattern. This will take a while to use up.

Thank you is just not enough for your generosity and kindness.
Keep up with blogging. It is a way of us staying together and sharing our craft.
Thank you Jude….
Have a look at what Jude has for sale.
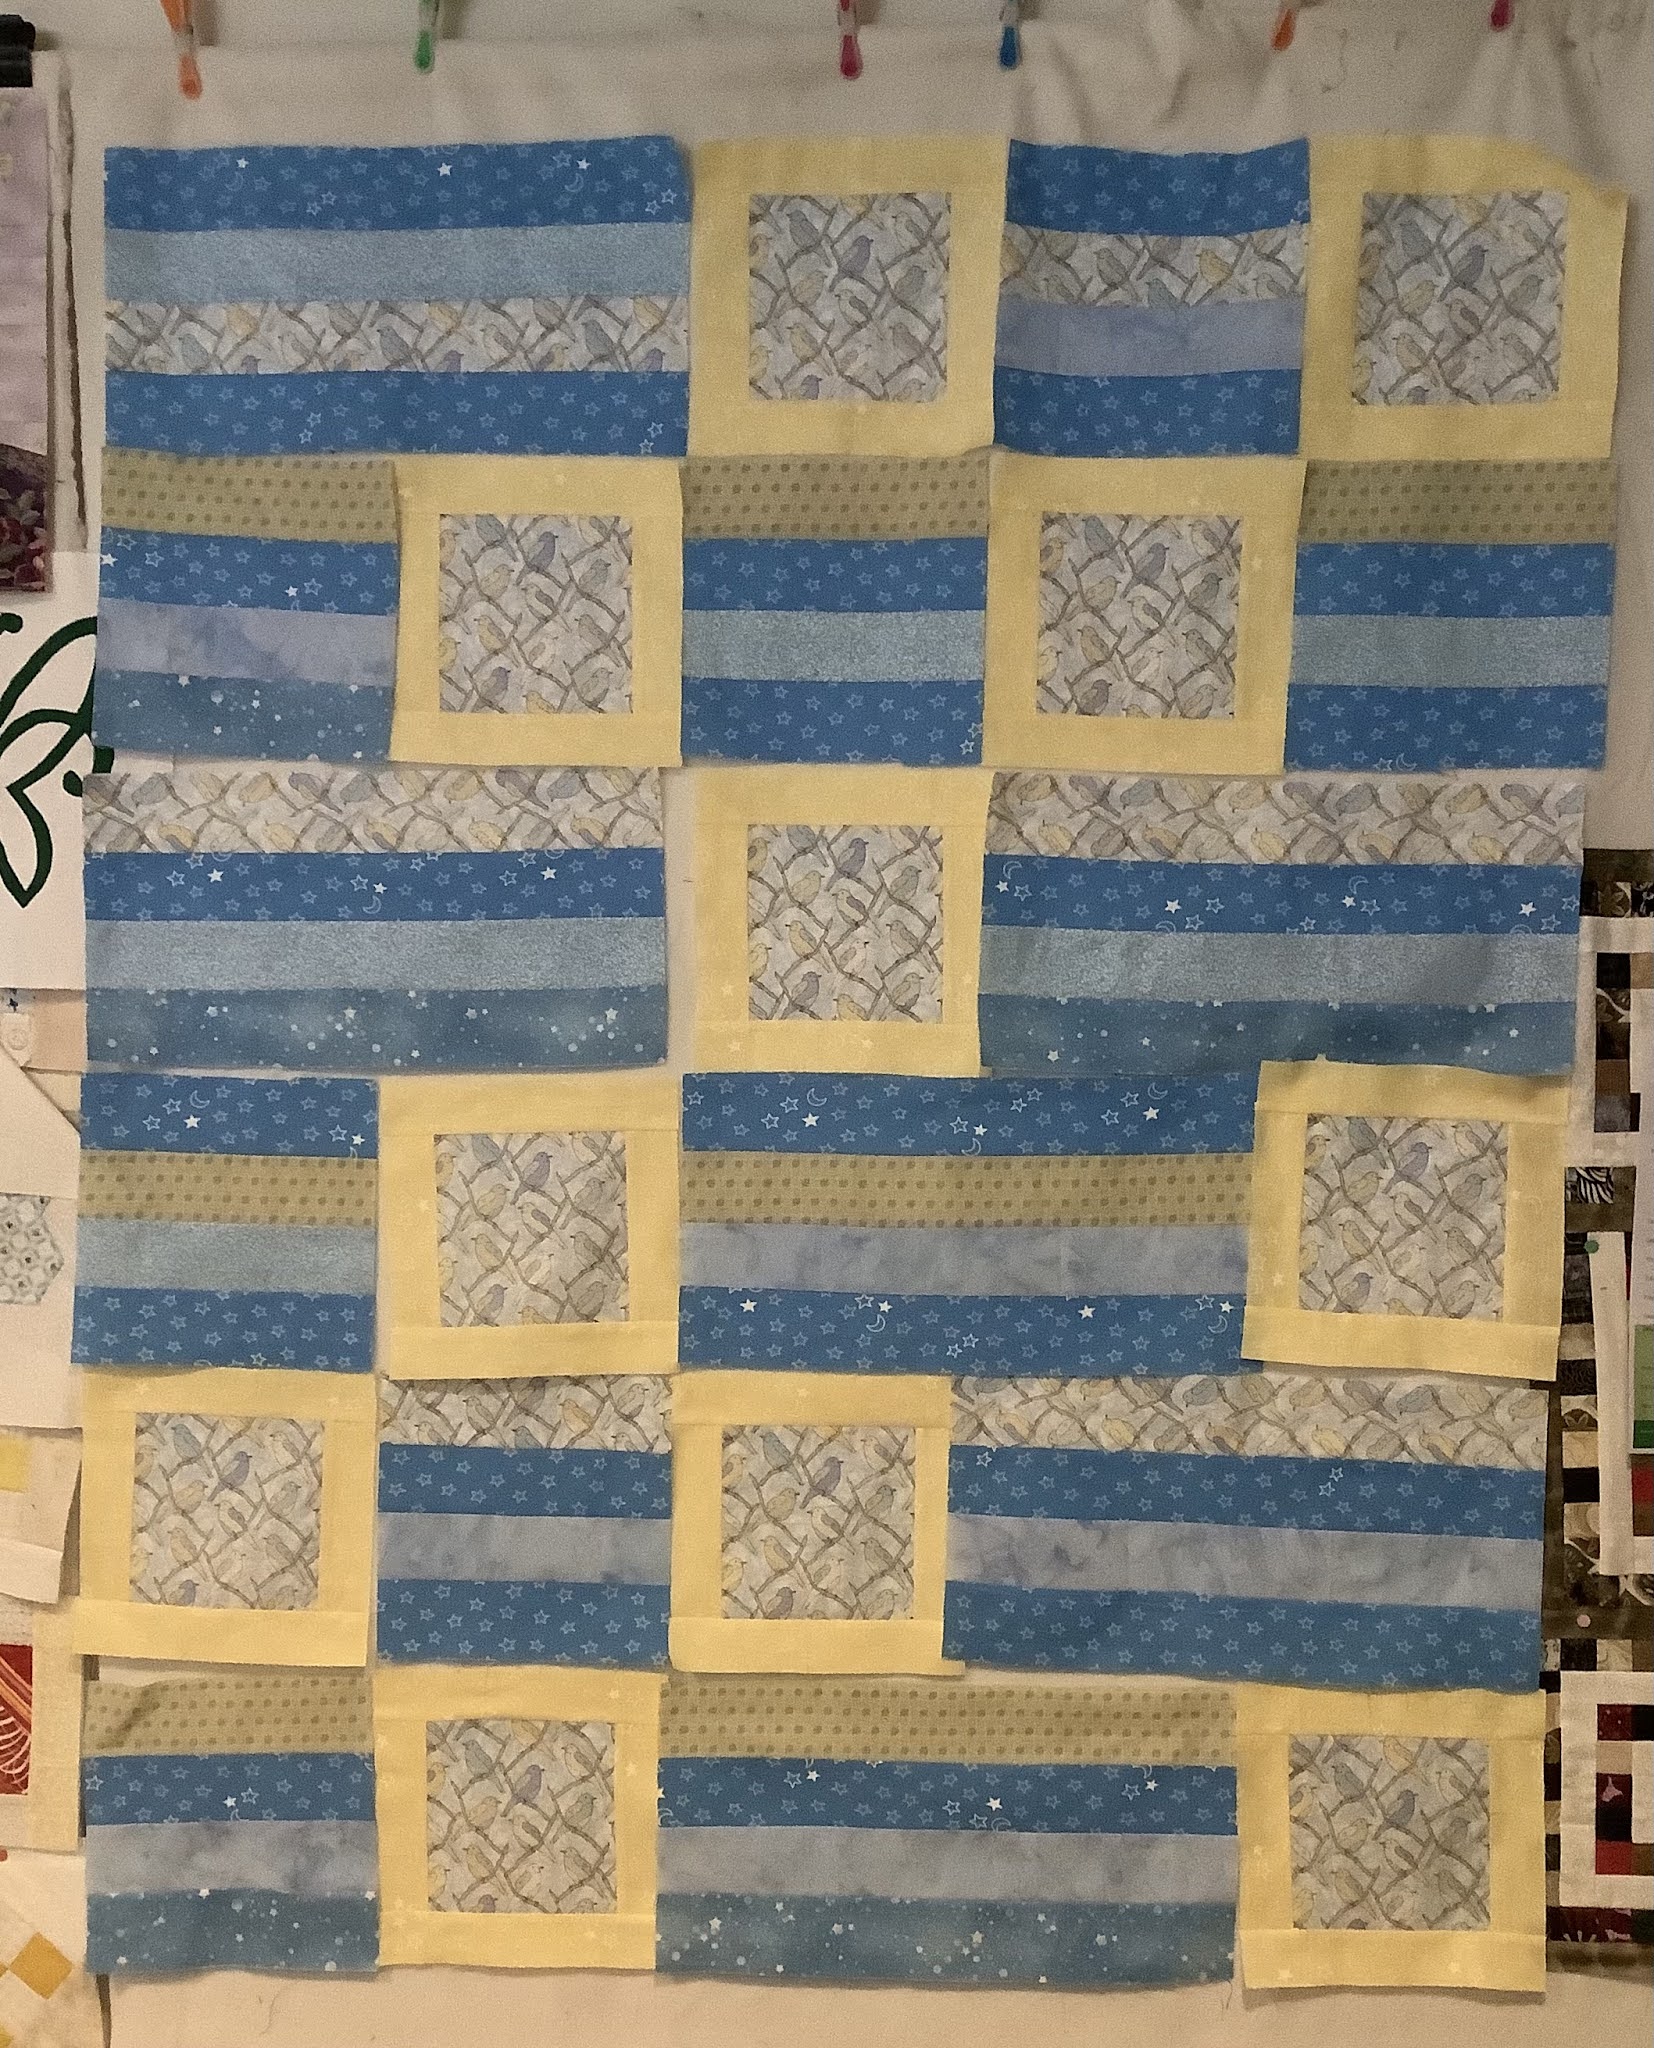
I might have to start stitching those squares together. This is one design I like